
Table of Contents
Electrical wiring a button switch is a foundational skill in electronics that makes it possible for hobbyists and specialists alike to manage circuits in a basic, yet efficient manner.
This overview is designed to walk you through the procedure in a genuine and rational means, making certain that you grasp not only the technological steps however also the underlying concepts.
We will certainly cover both conventional button switches and look into the specifics of circuitry brief push button switches, providing an extensive understanding of their applications and capabilities.
Understanding Push Button Switches
What is a push button switch?
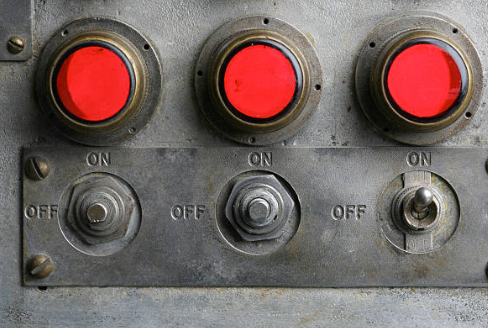
Before diving right into the wiring procedure, it's vital to recognize what push button switches are and just how they operate. Push button switches are straightforward tools that manage the flow of electrical power within a circuit.
Button Switches come in two main types: momentary and maintained. Momentary switches close the circuit only while the button is being pressed, whereas maintained switches change the state of the circuit until pressed again.
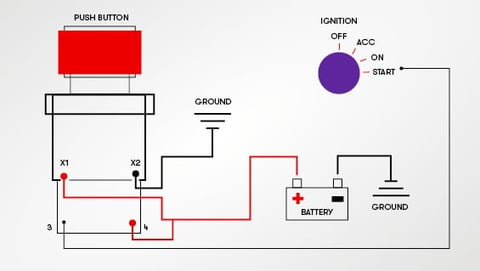
How to Install a push button starter switch?
First up, make sure your ride is off and the battery is disconnected – we’re not aiming for any unexpected fireworks here.
Now, find yourself a comfy spot under the dash or wherever you’ve decided to mount that shiny new button.
You’ll need to run a wire from the starter solenoid's ignition terminal right to your switch, and then from the switch back to the ignition coil or ignition switch's control terminal. This creates a new path for the electricity to flow when you push the button, firing up the engine.
Remember, solid connections are key, so if you can solder, now’s the time to show off those skills. And before you go reconnecting the battery and pushing the button like there’s no tomorrow, double-check all your connections.
Tools and Materials to Get Started
To wire a push button switch, you will need:
- A push button switch (either momentary or maintained, depending on your application)
- Electrical wire
- Wire strippers
- Soldering iron and solder (optional, depending on your connection method)
- Multimeter (for testing purposes)
Steps to Wire a Push Button Switch
Step 1: Recognizing the Pin Layout
Initially, determine the terminals on your push button switch. Most will certainly have at least two terminals: one for the input (power) and one for the outcome (tons).
In the case of DPDT (Double Pole, Double Toss) changes, there will be much more terminals for intricate circuit control.
Step 2: Preparing the Wires
Cut enough cord to reach from the power source to the switch and from the switch to the load. Strip around 1/2 inch of insulation from each end of the cords
Step 3: Attaching the Cords
For a maintained button: Connect one cable to the source of power incurable and the other end to among the switch terminals. Take an additional cable and link it from the 2nd terminal on the switch to your lots (e.g., a light bulb or motor).
For a momentary push button: The circuitry is similar; nonetheless, the circuit will just be completed while the switch is pressed.
Step 4: Securing the Connections
Make certain that the links are secure. This can be done by soldering the cables to the terminals or using screw terminals if your button has them.
Step 5: Testing
Utilize a multimeter to test the links. Ensure the circuit is open when the switch is not pressed and closed (continuity exists) when pushed.
Through this testing procedure, you can test a push button switch with ease assisted with a multimeter.
Bonus: How to Wire a Momentary Push Button Switch
Wiring a momentary push button switch follows the same standard principles however pays special focus to the button's habits - it only activates the circuit while pressed. Temporary switches are excellent for applications calling for individual input, like a buzzer or a computer power switch.
Special Considerations for Momentary Switches
- Typically Open (NO) vs. Normally Closed (NC): Momentary switches can be normally open (breaking the circuit when not pressed) or normally closed (completing the circuit when not pressed). Choose based on whether you want the circuit's default state to be open or closed.
- Circuitry for Specific Applications: Some applications may need the switch to cause a relay or a semiconductor-based circuit, which can present added wiring factors to consider, such as requiring a pull-up or pull-down resistor to make sure appropriate functionality.
Final Thoughts
To wire a push button switch, be it maintained or short-term, is a skill that opens a world of opportunities for producing interactive electronic projects. By understanding the basics detailed in this guide, you can implement these switches in a range of applications, from basic illumination controls to more complex electronic circuits.
Just keep in mind, the secret to successful electronics tasks exists not simply in adhering to actions yet in recognizing the concepts behind them, guaranteeing your creations function as planned and impress those who engage with them.